After the disappointment of buying a broken Steadicam JR, and finding out that the only other one in the country had been sold, I thought I'd have a crack at making one. The two 'proper' steadicams I could get for my Canon 550d that are any good, are the Steadicam Merlin and the Glidecam 2000. They cost hundreds of pounds, but I preferred to spend more like £17.43.
This French guy and this Scottish fella seemed to have the best DIY examples I could find. It's pretty amazing what they've done for so little cash. Both designs were made with a universal joint & skateboard bearings to form the mechanics of the gimbal (wobbly handle). I ordered the traxxass universal joint (£5.61) recommended by Mr Scottish Man, some bearings for skateboard wheels (about £3 for ten) and two LED torches (the Scottish fella used one to make the handle. They were so cheap I bought two 'just in-case').
I couldn't find the right-sized washers or screws, and annoyingly it turned out that the DIY shop recommended to me in Hove didn't machine-cut anything. Defiantly, I raced around the house, looking in drawers and bashing things with hammers, until I found...
Some stuff.
DISCLAIMER. I have no idea what I'm doing. I'm completely hopeless at any sort of mechanical engineering/physics/fixing stuff/drilling/gluing etc.
Most of the bits I found fortuitously fitted fantastically, so I managed to attach the universal joint:
To my torch handle, via a mysterious bit of white plastic which perfectly fit inside the handle. Plus a screw, washers and a bearing.
I made something!
It was a tiny bit wobbly, so I took it to Dan Rickard, zombie-filmmaker extraordinare and 'man-with-vice'. He took one look at the fruits of my proud labour, and wiped the idiot smile off my face by completely disassembling it. Thankfully, he then made it better and put it back together again.
At the end of a depressing hour in B&Q staring at fittings and bits of metal, I was trying to decide whether to construct the frame out of metal tubing (hard to cut/bend/fit together) or pvc (not as sturdy) when I turned around to see this shelf bracket, five minutes before the shop closed.
Ooooh. Shelf bracket.
Much bashing, fixing and swearing later, I nearly had something testable.
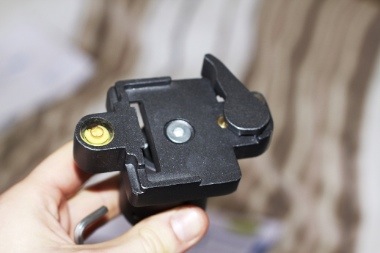
Adding the camera plate from my old tripod onto the steadicam.
Dan drilling/fixing/vice-operating while I played with my new close-up lenses.
 And after some epoxy-resin hardcore glue to keep the gimbal in place, behold, the shoddiest-looking steadicam ever made!
It needs a couple of adjustments. some weight tweaks/safety measures (I'm still slightly terrified every time I put the camera on there, although it is pretty sturdy) and the addition of an elastic band. The frame has a tendency to 'free-wheel' and start spinning on the gimbal axis as soon as I move, so I'm going to set up a little 'steering wheel' with an elastic band, operated by the thumb of the hand holding the gimbal.
So it will get better, and I'll get better at operating it, but for less than £25 in total I'm pretty chuffed.


